Incorrect mold temperature1 causes defects2 and ruins expensive tools. This instability costs you time and money, putting your entire project schedule at serious risk.
Mastering mold temperature requires a balanced strategy. You must preheat the mold to an optimal starting temperature (around 180-280°C) and then use strategically designed cooling channels3 to extract heat consistently. This ensures part quality4, short cycle time5s, and long tool life6.
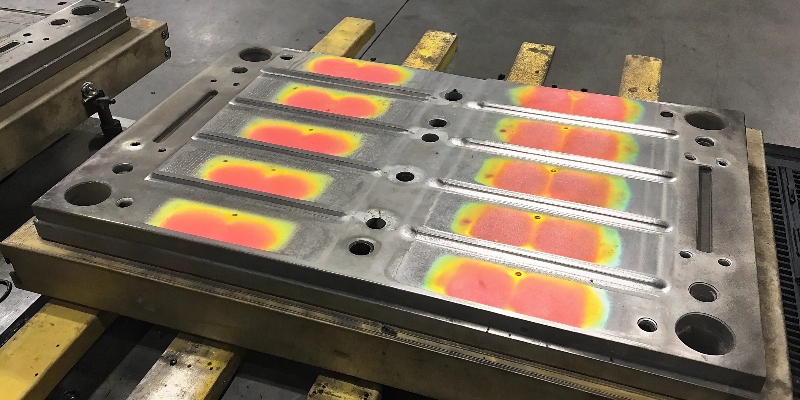
Getting this balance right is one of the most critical skills in die casting. It’s not just about heating and cooling; it’s about managing thermal energy7 with precision. For an engineer, a stable thermal profile is the foundation of a stable process. For a purchasing director like Simon, it’s a clear sign of a supplier who knows how to protect a significant investment in tooling. My team and I have spent years perfecting this thermal balancing act, and it’s the secret behind our consistent quality.
Why Does Mold Temperature Control Matter in High-Pressure Die Casting?
You’re battling defects like flow lines, shrinkage, and soldering. The root cause is often an unstable mold temperature, turning your reliable production process into a game of chance.
Proper temperature control is critical because it directly influences metal flow, solidification rate, and overall part quality. A stable thermal process prevents surface defects and internal porosity, reduces cycle time, and protects the mold from premature failure due to thermal shock.
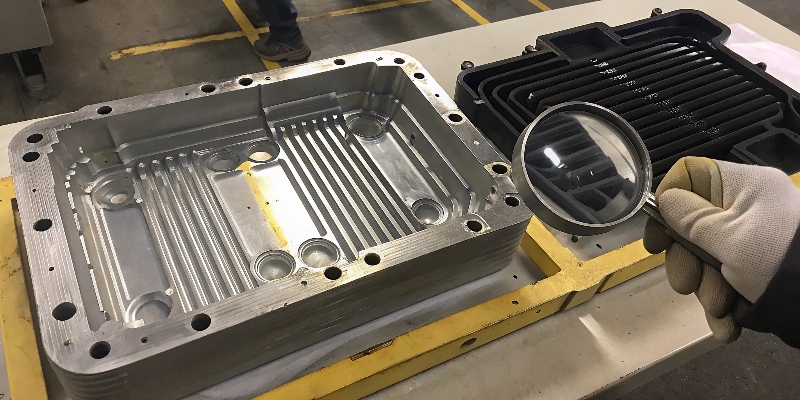
The temperature of the mold is the very first thing the molten aluminum experiences when it enters the cavity. Its condition dictates everything that happens next. If the mold is too cold, the metal freezes before it can fill the part completely, leading to defects like misruns or flow lines. If it’s too hot, the aluminum can start to weld itself to the tool steel, a defect we call soldering, which damages the mold surface. More importantly, temperature stability is the foundation of a repeatable process. You can’t achieve consistent part quality if your mold temperature is fluctuating with every shot. It directly impacts:
- Part Quality: Prevents surface defects, ensures proper filling, and controls solidification to minimize shrinkage porosity.
- Cycle Time: A thermally stable mold allows for a fast, consistent cycle time. Uncontrolled hot spots will force you to slow down the process to avoid defects.
- Tool Life: Drastic temperature swings create thermal shock, which is the primary cause of heat checking (fine cracks) and premature tool failure.
What Are the Recommended Preheating Temperatures for Mold Materials?
Starting production with a cold mold is a recipe for disaster. This thermal shock causes scrap parts from the very first shot and can create cracks in your expensive tool steel.
For common tool steels like H13 used in aluminum die casting, the recommended preheating temperature is between 180°C and 280°C (350°F and 540°F). The exact temperature depends on the part’s wall thickness and complexity to ensure good metal flow and prevent defects.
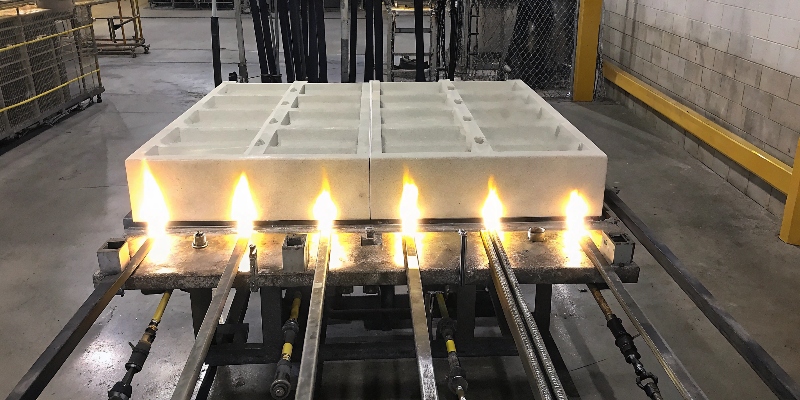
We never inject molten aluminum8 into a cold mold. The shock of hitting room-temperature steel with 660°C metal would be catastrophic for the tool. Preheating brings the tool steel up to a safe operating temperature, reducing stress and preparing it for production. The right temperature ensures that the first parts we produce are good parts. We don’t have to spend hours making scrap just to get the mold up to temp. The ideal preheating temperature is a balance based on the part’s geometry. A hotter mold helps the metal stay fluid longer, which is essential for filling parts with very thin walls. For chunkier parts, we can start a bit cooler since the part itself will hold more heat.
| Part Characteristic | General Preheating Range (°C) | Rationale |
|---|---|---|
| Thin-Walled Parts (<2mm) | 240 – 280°C | Needs a hotter mold to prevent the metal from freezing before the cavity is full. |
| Standard Parts (2-5mm) | 200 – 250°C | A balanced temperature for good filling and a reasonable cycle time. |
| Thick-Walled Parts (>5mm) | 180 – 220°C | Can use a cooler starting point as the part retains heat longer; the focus is on efficient cooling. |
How Do Cooling Channel Designs Create Stable Cycle Times?
Your cycle time5s are inconsistent, and you’re seeing hot spots on the parts. This problem is often caused by poorly designed cooling channels that cannot remove heat effectively from the mold.
Best practices for cooling channel design involve placing them close to part hot spots9 and ensuring high water flow rates. This allows for rapid and uniform heat extraction, leading to consistent solidification times and stable, predictable cycle times for every single shot.
The die-casting cycle is a constant transfer of heat. With every shot, we inject a massive amount of thermal energy into the tool with the molten aluminum. The job of the cooling system is to remove that same amount of energy before the next shot. If it can’t keep up, the mold gets hotter and hotter, cycle times get longer, and defects start to appear. At EMP Tech, we use mold flow simulation to predict exactly where heat will build up in the mold—usually in thick sections or near the gate. We then design a network of cooling channels directly in these areas. For deep cores or hard-to-reach spots, we use specialized components like baffles and bubblers, which force the cooling fluid into the hot spot for maximum effect. The goal is to achieve a state of thermal equilibrium, where the mold temperature remains steady throughout the entire production run. This is the key to a fast and repeatable process.
What Common Mold Temperature Control Equipment Is Used in Foundries?
You are seeing inconsistent part quality and defects. Relying on the casting process alone to heat up and cool down the mold is an uncontrolled and unreliable method that leads to scrap.
Modern foundries use specialized equipment for precise thermal management. This includes oil or water-based Temperature Control Units (TCUs) for closed-loop heating and cooling, alongside portable gas torch heaters for initial preheating and spot heating during production runs.
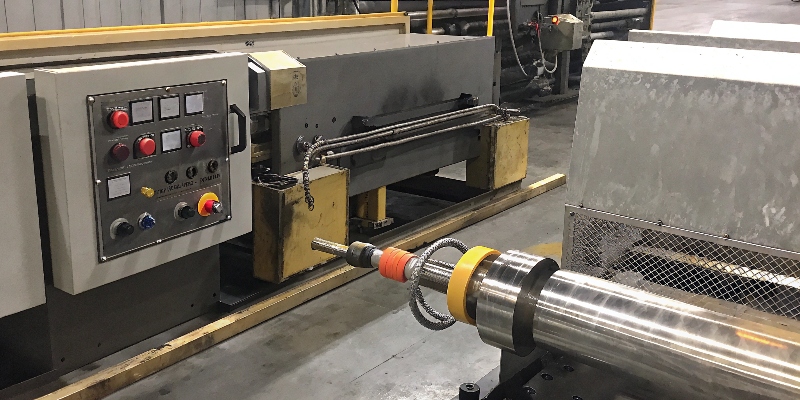
A professional die-casting operation doesn’t leave temperature to chance. We use a combination of tools to manage the thermal energy in the mold. The most important piece of equipment is the Temperature Control Unit, or TCU. Think of it as the thermostat and air conditioner for the mold, all in one. It circulates a fluid—either hot oil or pressurized water—through the mold’s cooling channels. It can heat the fluid to preheat the mold or cool it to extract heat during production, all to maintain a precise target temperature. For a quality engineer, a process controlled by a modern TCU provides confidence that the thermal conditions are stable and repeatable.
| Equipment | Function | Medium | Key Advantage |
|---|---|---|---|
| Temperature Control Unit (TCU) | Preheating & Active Cooling | Hot Oil or Pressurized Water | Provides precise, closed-loop temperature control throughout production. |
| Gas Torch Heaters | Manual Preheating | Flame | A quick, portable solution for bringing the mold to a base temperature before startup. |
| Electric Cartridge Heaters | Localized Heating | Electric Resistance | Embedded in the die to heat specific cold spots or keep hydraulic slides warm. |
What Are the Effects of Uneven Cooling on Casting Defects and Tool Life?
You’re seeing warped parts and cracked molds. These serious problems are often symptoms of a hidden enemy: an uneven mold temperature, which creates massive internal stress in both the part and the tool.
Uneven cooling causes defects like warping, shrinkage porosity, and hot tearing as different areas of the casting solidify at different rates. It also creates intense thermal stress in the tool steel, leading to heat checking (fine cracks) and dramatically reducing tool life.
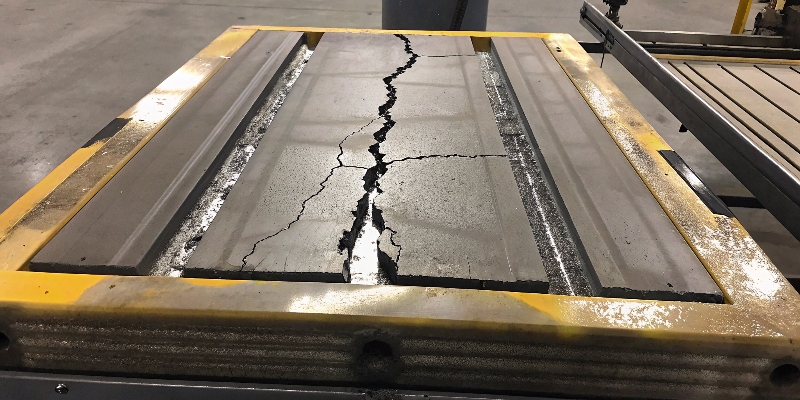
When one part of the mold is significantly hotter than another, you create a thermal battleground. The consequences are severe. For the part, if one side cools and shrinks faster than the other, the whole part will warp and distort. This is a critical failure for components with flat sealing surfaces, like the EV housings we manufacture. Uneven cooling also creates isolated hot spots that are the primary cause of shrinkage porosity. For the tool itself, the effect is just as damaging. The surface of the steel is constantly expanding and contracting at different rates. This repeated stress cycle causes a network of fine cracks to form on the mold surface, a phenomenon called heat checking. These cracks get transferred to the part surface, causing a cosmetic defect, and over time they can grow into major cracks that destroy the tool. This is a huge financial risk that a good supplier knows how to prevent.
How Do Leading Manufacturers Balance Preheating and Cooling for Process Stability?
Achieving a stable casting process can feel like a constant battle. You find yourself always adjusting machine parameters to fight defects, but the process never seems to truly settle down.
Top manufacturers achieve a "thermally balanced" state. They use mold flow simulation to design optimal heating and cooling circuits, preheat the die to a stable setpoint, and then use closed-loop TCUs to actively add or remove heat to maintain that target temperature.
The goal of world-class thermal management is to reach a state of equilibrium, where the tool temperature remains rock-solid from the first shot of the day to the last. This isn’t luck; it’s a deliberate, three-stage strategy.
- Proactive Design: Before we cut any steel, we use mold flow simulation software to run a full thermal analysis. We can see where the hot spots will be and design a cooling circuit specifically to counteract them. This solves problems before they happen.
- Stable Setup: We use our TCUs and heaters to bring the entire mold up to a uniform target temperature. This ensures we start from a known, stable baseline.
- Active Production Control: During the run, sensors inside the mold provide live feedback to the TCU. It automatically makes micro-adjustments, pumping in slightly cooler or hotter fluid to hold the temperature within a very tight window, often ±5°C. This active management ensures that the heat we remove in each cycle perfectly balances the heat we put in. This stability is the key to making high-quality parts at the fastest possible cycle time.
Conclusion
Mastering mold temperature isn’t just about heating and cooling; it’s about achieving thermal stability. This is the absolute foundation for producing high-quality, defect-free die castings with every single shot.
-
Understanding mold temperature is crucial for achieving high-quality die castings and preventing defects. ↩
-
Understanding common defects can help you implement effective strategies to minimize them. ↩
-
Learn about effective cooling channel designs to ensure consistent cycle times and part quality. ↩
-
Explore the direct relationship between mold temperature and the quality of die cast parts. ↩
-
Learn how to optimize cycle time for efficiency and productivity in die casting. ↩ ↩
-
Find out how proper temperature management can significantly enhance the longevity of your tools. ↩
-
Explore how managing thermal energy can enhance the efficiency and quality of die casting. ↩
-
Learn about the significance of molten aluminum and its impact on the die casting process. ↩
-
Learn about the impact of hot spots on die casting quality and how to manage them. ↩


