

The part was a 1.4 kg AlSi9Cu3 cover for a charger housing, powder coated in epoxy-polyester at 180 °C for 15 minutes, and it came back from the coater with blisters. Not many: six to eleven per part, always on the inside of the ribbed boss area, always about 0.8 to 1.2 mm across. The coater blamed the casting. The buyer blamed the coater. Both were partly right, which is the usual situation when a casting meets a powder line.
Powder coating is a good process for die cast aluminium and a bad process for die cast aluminium that has not been prepared for it. The difference between the two is almost never the powder. It is what happens in the 0.5 mm below the surface.
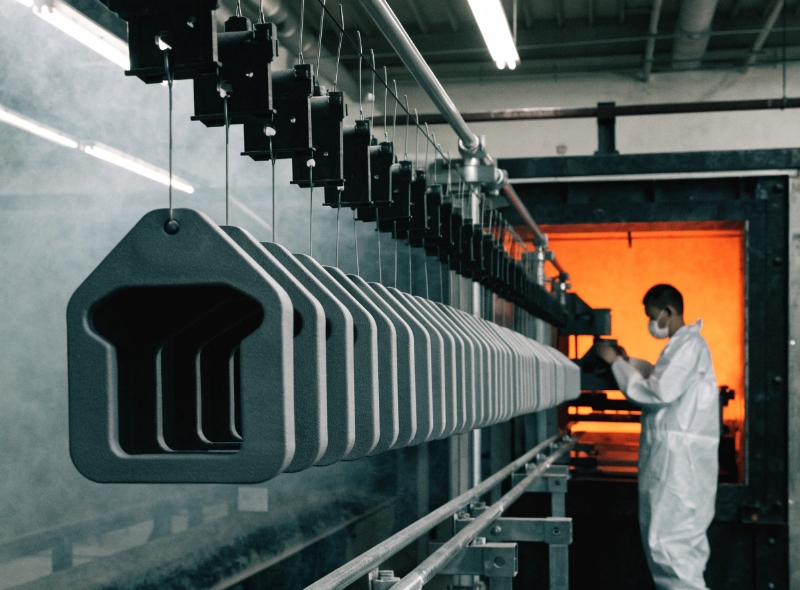
What powder coating does to a casting that paint does not
Liquid paint dries and most of the solvent leaves at the surface. Powder melts, flows, and cures as a continuous film 60 to 90 µm thick, and it does that at 180 to 200 °C for 10 to 15 minutes. During those minutes, any air or vapour trapped in the casting has both a reason and a route to expand: the film is soft, the pressure behind it rises, and the film is only tens of microns thick. It blisters. Then it cools, the film hardens, and the blister stays as a visible defect with a cavity under it.
A painting line at 60 °C does not do this. That is why a part that has been wet-painted for years can suddenly fail when the customer switches to powder for VOC reasons, and why the failure gets blamed on the coater who changed nothing. Coatings suppliers describe the escape route the same way: TIGER Coatings’ technical note on outgassing puts the fix on substrate and part metal temperature rather than on the powder, and recommends holding the part above the specified PMT long enough for the trapped gas to leave before the film gels.
Where the gas comes from
Four sources, and they are distinguishable by where the blisters sit and what they look like when you cut one open. Two of them are casting defects in the ordinary sense — the same ones that show up in a surface defect inspection — and two are chemistry.
Subsurface porosity. Voids within 0.3 to 1.0 mm of the surface. The metal skin over them is thin and slightly porous itself. Air expands, migrates, lifts the film. Blisters are round, evenly sized, and cluster where the casting had gas porosity — often opposite the gate or at the last-filled corner. Cutting one open shows a void of 0.2 to 0.5 mm immediately under the film.
Entrapped die lubricant. Release agent or plunger lubricant that boiled into the surface layer during fill. Blisters here are irregular, sometimes elongated, and often accompanied by a dark residue in the cavity. They concentrate near ejector pins and in deep pockets where spray accumulates.
Oxide and silicon smut. Not gas, but a weak boundary layer. The film does not blister so much as flake or peel from a scribe line, and adhesion testing fails before salt spray even starts. On high-silicon alloys the machining or blasting step can smear silicon at the surface, and no conversion coating will bond to it. If the surface already has visible defects before it reaches the coater, the coating will not hide them — it will outline them.
Moisture in the conversion coating. Rinse water or conversion chemicals not fully dried before the part enters the oven. Blisters appear as a general roughness rather than discrete dots, and they show up on flat surfaces as much as on ribs.
| What you see | Most likely source | How to prove it | What fixes it |
|---|---|---|---|
| Round blisters, 0.5 to 1.5 mm, clustered | Subsurface porosity | Cut through a blister; void under film; compare with X-ray of the same area | Pre-bake the castings before coating, or move the defect out of the cosmetic zone |
| Irregular blisters near ejector pins | Entrapped lubricant | Solvent wipe test; dark residue in cavity | Reduce spray, add air blow-off, change lubricant; heat to 200 °C and inspect |
| Peeling from a scribe, no blisters | Smut, oxide, weak pretreatment | Cross-cut per ISO 2409; look for Gt3 or worse | Fix deoxidising step; check etch rate and bath life |
| Uniform fine roughness | Wet part entering the oven | Weigh parts before and after dry-off | Dry-off at 110 to 120 °C, check jig drainage |
The pre-bake, and why it is the cheapest test you can run
Before arguing with anybody, put twenty castings in an oven at 200 °C for 30 minutes with no powder on them, then look at the surface. Blisters that would have appeared under the powder appear as tiny raised dots or as small craters where the skin has lifted. Parts that survive this pass are usually safe to coat; parts that fail will fail again in the coating oven no matter which coater you use.
This costs half an hour and one oven cycle. It converts a three-way argument between buyer, caster and coater into a pass or fail on a table. We now run it as an incoming check whenever a new casting goes to powder, and it has caught two projects before the first production lot.
Where the part is architectural and the finish is being specified rather than repaired, the test regime is already written down. QUALICOAT’s 2024 specifications fix the pretreatment sequence and the acceptance tests — adhesion by cross-cut, impact, acetic acid salt spray — that a licensed coater is audited against, which means “the powder was bad” is an argument you can settle with a specification number instead of an opinion.
If the pre-bake finds porosity, the options are, in order of cost: move the cosmetic zone on the drawing, add a machining allowance so the porous skin is cut away, change the casting process to reduce porosity, or seal the surface with an impregnation step. The last one is real and used, but check with the coater first — some impregnants do not survive the cure temperature.
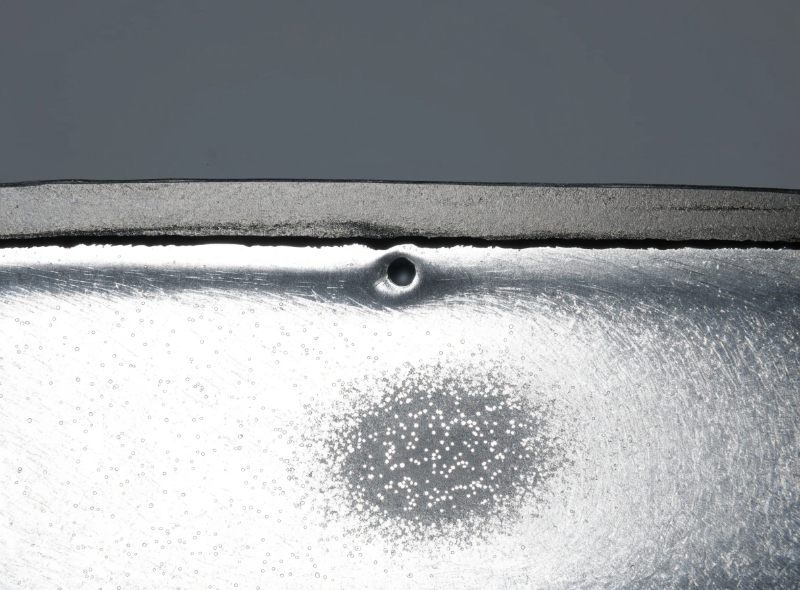
Pretreatment is where adhesion is decided
The coating film is 60 to 90 µm. The bond is decided in the first 0.05 µm. For die cast aluminium the sequence that works is:
1. Alkaline degrease, 50 to 60 °C, 5 to 8 minutes, with ultrasonic if the part has blind holes.
2. Etch or deoxidise — this is the step that removes the smeared silicon and magnesium oxide layer.
3. Conversion coating: chrome-free zirconium or titanium, 30 to 90 seconds, coating weight 20 to 60 mg/m². Chromate works better and is being legislated out of most markets.
4. DI rinse, then dry-off at 110 to 120 °C.
5. Powder, then cure per the powder datasheet — typically 180 °C metal temperature for 10 minutes, not oven air temperature.
The distinction between oven air and metal temperature is where a lot of “the powder did not cure” complaints come from. A thick casting takes 8 to 12 minutes just to reach oven temperature. If the datasheet says 180 °C for 10 minutes and the line runs a 15-minute cycle at 180 °C air, the part may only be above 170 °C for four minutes. The film will pass a fingernail test and fail a 500-hour salt spray.
Powder against the alternatives, for die cast aluminium specifically
| Process | Typical thickness | Temperature the part sees | Adhesion on die cast | Where it wins | Where it fails |
|---|---|---|---|---|---|
| Powder coating | 60 to 90 µm | 180 to 200 °C | Good, if pretreatment is right | Exterior durability, thick film in one pass, no VOC | Blisters over subsurface porosity; hard to touch up |
| Liquid paint | 20 to 40 µm | 60 to 80 °C | Good | Thin films, colour matching, low oven load | Solvent emissions; multiple coats for durability |
| E-coating | 15 to 25 µm | 160 to 180 °C | Excellent, covers edges and inner surfaces | Complex geometries, primer layer under powder | Limited colour range; needs its own line |
| Anodising | 10 to 25 µm | Room temperature process | Poor to fair on high-silicon alloys | Hard, decorative, dimensional control | Silicon particles cause dark, patchy finish |
If the part is high-silicon, anodising will fight you and powder will not care — that trade-off is the whole subject of anodising versus electroplating. If the part is thin-walled with tight tolerance, the 180 °C cure and the 80 µm film both eat tolerance, and an e-coat plus a thin liquid topcoat is often the better answer. Our note on surface treatment methods covers the durability side; the coating decision is usually made on the geometry, not the corrosion number, and for plated finishes the pretreatment constraints are different again.
What we did on the charger cover
The pre-bake test failed on 14 of 20 parts. Cutting two blisters showed voids 0.3 to 0.6 mm under the film, right where the ribbed bosses sat. The bosses were at the last-filled end of the cavity, 180 mm from the gate, with 3 mm walls — the classic place for gas porosity that X-ray at 200 µm barely sees and machining never reaches.
Three changes, in this order of cost:
1. Castings now get a 200 °C / 30 min pre-bake and the surviving parts go to powder. This alone cut the reject from 6 % to 1.8 %.
2. The gate on that cavity was widened by 30 %, which reduced the gas entrapment at the boss end; reject went to 0.9 %.
3. The drawing was changed so the boss faces are machine-finished 0.5 mm, moving the cosmetic surface out of the porous skin.
Total reject now 0.4 %, and the coater still runs the same powder and the same oven. Nothing about the coating changed. The casting did.
Cost of the whole exercise: about 9,400 € across die work, extra machining and a month of sorting, against a rework cost of 3.2 € per part on 22,000 parts a month. It paid back in six weeks. The larger cost was the two customer meetings where we had to explain that the defect had been in the casting all along and the coating had simply been hiding it on wet-paint parts.
Frequently Asked Questions
Can you powder coat over porosity without blisters?
Sometimes, if the pores are deeper than 1 mm and the skin above them is sound, but you cannot rely on it. The workable approach is to test the specific casting with a 200 °C pre-bake, and if it fails, change the casting or machine the surface — not to ask the coater to try a different powder. Thicker films make blisters worse, not better.
Does the alloy matter?
Yes. High-magnesium alloys like A360 form a magnesium oxide skin that resists conversion coating and gives poor adhesion if the deoxidising step is weak. High-copper alloys like A380 are more forgiving for coating but worse for anodising. If a project is being switched from A380 to A360 for corrosion reasons, the coating process usually needs to be re-qualified at the same time.
How do I write the coating requirement on the drawing?
Specify the standard, the film thickness range, the colour, and the corrosion test with hours, then add the one line that matters: “no blisters or pinholes when viewed at 300 mm under 500 lux”. Without a viewing condition, “no blisters” means three different things to three inspectors.
What about coating a machined surface?
It works, but the film is 60 to 90 µm and it will fill a 0.5 mm chamfer. Anything with a mating face, a thread, or a seal groove needs masking, and masking cost per part often exceeds the coating cost. On parts with more than four masked features we usually steer the design toward a liquid coat or a localised finish.


