Burrs—those small, sharp ridges of excess material left behind after casting—are an unavoidable reality in aluminum die casting. For a Supplier Quality Engineer like yourself, they are a constant source of concern. A single, overlooked burr can lead to failed leak tests on an EV controller housing, interfere with critical assemblies, or even pose a safety risk. For a Purchasing Director, inconsistent deburring means part rejections, production delays, and escalating costs that threaten tight project schedules.
The problem isn’t just removing the burrs; it’s doing so consistently, cost-effectively, and without damaging the part or compromising its dimensional integrity. Choosing the wrong deburring method can be just as damaging as not deburring at all. It can lead to surface imperfections, rounded edges that should be sharp, and violations of strict IATF 16949 requirements.
As an engineer with over two decades of hands-on experience in die casting, I’ve seen how critical a well-defined deburring strategy is to project success. The solution lies in understanding the available methods and selecting the one that best matches your part’s specific geometry, tolerance, and volume. This guide breaks down the four most common deburring methods for aluminum die-cast parts.
1. Manual Deburring with Files and Abrasive Tools
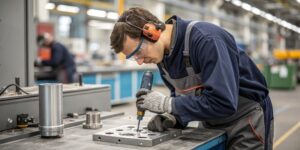
This is the oldest and most straightforward method. Skilled operators use hand tools like files, scrapers, grinders, and abrasive cloths to physically remove burrs from the part. It relies entirely on human touch and judgment.
- How it works: An operator visually inspects the part, identifies burrs, and carefully scrapes or sands them down until the surface is smooth and meets the required specifications.
- Best for:
- Low-volume production runs.
- Prototypes and first-off parts.
- Large, bulky parts where automated methods are impractical.
- Removing burrs in specific, hard-to-reach areas that automated systems might miss.
- Pros:
- Low Initial Investment: Requires only basic hand tools and a workstation.
- Flexibility: Can adapt to complex and unusual part geometries on the fly.
- Cons:
- Inconsistency: Results vary significantly between operators and are prone to fatigue. This is a major risk for quality control.
- High Labor Costs: Very labor-intensive and not scalable for high-volume production.
- Risk of Damage: Over-deburring or scratching the part surface is a common issue.
2. Mechanical Deburring Using Tumbling or Vibratory Machines
Mechanical deburring automates the process by placing parts in a machine with abrasive media. The machine then either tumbles (rotational motion) or vibrates, causing the media and parts to rub against each other, grinding away burrs.
- How it works: Parts are loaded into a tub or bowl along with a selected abrasive media (e.g., ceramic, plastic, or steel shapes). The machine’s motion creates friction between the media and the parts, effectively sanding down all exposed edges and surfaces simultaneously.
- Best for:
- High-volume production of small to medium-sized parts.
- Parts without complex internal cavities or deep, narrow features.
- Applications where a uniform, non-directional surface finish is desired.
- Pros:
- Consistency: Provides highly repeatable results from batch to batch.
- Cost-Effective for Volume: Drastically reduces labor costs for large quantities.
- Simultaneous Polishing: Can also clean, polish, and improve the overall surface finish of the part.
- Cons:
- Lack of Selectivity: Removes material from all edges, not just burrs, potentially rounding sharp edges that need to be maintained.
- Risk of Lodging: Media can get stuck in small holes or internal passages.
- Potential for Damage: Parts can impinge on each other, causing nicks or surface damage if not managed correctly.
3. Thermal Deburring (Thermal Energy Method – TEM)
Thermal deburring is a highly efficient process for removing burrs from both internal and external surfaces simultaneously. Parts are placed in a sealed chamber, which is then filled with a combustible gas mixture. The mixture is ignited, creating a momentary, high-temperature thermal wave.
- How it works: The burrs, with their high surface-area-to-mass ratio, are instantly vaporized by the burst of thermal energy. The bulk of the part, however, simply absorbs the heat without damage, as the event lasts only milliseconds.
- Best for:
- Complex parts with intersecting drill holes and intricate internal passages (e.g., hydraulic manifolds, valve bodies).
- High-volume applications where complete burr removal is critical.
- Removing burrs that are impossible to reach with manual or mechanical methods.
- Pros:
- Complete Burr Removal: Reaches and removes all burrs, regardless of their location.
- Extremely Fast: Cycle times are typically less than a minute per batch.
- High Repeatability: Delivers exceptionally consistent results.
- Cons:
- High Capital Investment: The equipment is expensive.
- Leaves a Minor Oxide Layer: A thin oxide layer may form on the surface, which might require a secondary cleaning step.
- Not Suitable for All Parts: Thin-walled or delicate components may be distorted by the thermal shock.
4. Electrochemical Deburring (ECD)
Electrochemical deburring is a precision method that uses electrolysis to dissolve burrs without any mechanical contact. It is essentially the reverse of electroplating. The part is used as the anode, and a custom-shaped tool serves as the cathode.
- How it works: The part and tool are placed in an electrolyte solution. An electrical current is applied, causing a controlled electrochemical reaction that selectively dissolves material from the burr locations.
- Best for:
- Precision components with very tight tolerances.
- Critical medical, aerospace, and automotive parts (e.g., fuel injectors, automatic transmission components).
- Deburring specific, targeted areas without affecting the rest of the part surface.
- Pros:
- High Precision: Removes burrs without altering the part’s dimensions or surface finish.
- No Mechanical Stress: As there is no contact, it induces no mechanical or thermal stress.
- Fast and Repeatable: Ideal for automated, high-volume production lines.
- Cons:
- High Initial Cost: Requires custom tooling for each specific part and burr location.
- Material Specificity: The process and electrolyte must be tuned for the specific alloy being used.
- Limited to Conductive Materials: Only works on electrically conductive parts.
How to Choose the Right Method
The best choice is a balance of precision, volume, component complexity, and cost. Here is a summary to guide your decision:
| Method | Best For | Key Advantage | Main Downside |
|---|---|---|---|
| Manual Deburring | Low volume, large parts, prototypes | Low setup cost, high flexibility | Inconsistent, high labor cost |
| Mechanical Deburring | High volume, simple parts, uniform finish | Low cost per piece, high consistency | Non-selective, risk of lodging |
| Thermal Deburring | Complex internal geometries, high volume | Reaches all burrs, extremely fast | High capital cost, may need cleaning |
| Electrochemical Deburring | Precision parts, tight tolerances | No mechanical stress, highly selective | Requires custom tooling, high cost |
My Expert Insight
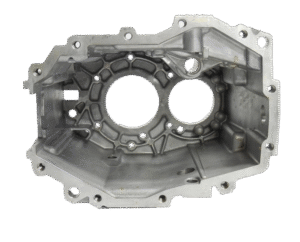
In my work on EV controller housings, where high airtightness is non-negotiable, the choice of deburring is critical. A burr on a sealing surface can cause a leak and immediate part failure. We often use a combination of methods: CNC machining to pre-deburr critical features, followed by either targeted manual deburring for sealing grooves or vibratory finishing for a uniform overall surface, depending on the customer’s exact requirements. The key is to define the deburring strategy during the DFM phase, not as an afterthought.
Conclusion
Deburring is not a one-size-fits-all process. By understanding the fundamental differences between manual, mechanical, thermal, and electrochemical methods, you can engage with your suppliers more effectively. This allows you to specify a process that ensures part quality and dimensional accuracy while aligning with your project’s budget and production scale. This strategic approach turns deburring from a potential production bottleneck into a predictable, value-added step in your manufacturing process.
Are you struggling to find a supplier who understands the critical details of finishing for aluminum die-cast parts?
At EMP Tech, we integrate deburring and finishing strategies right from the initial design and process planning stages. My team and I provide a one-stop solution that ensures every detail is managed, from mold flow to final inspection.
Let’s discuss how we can deliver clean, precise, and production-ready components for your next project. Contact me at [email protected].


