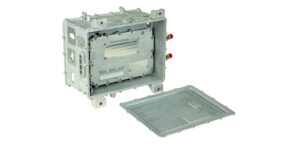
As a Supplier Quality Engineer, you open a shipment of critical aluminum die-cast housings, only to find them marred by unsightly drag marks. This isn’t just a cosmetic issue; it’s a quality red flag that could halt your production line. As a Purchasing Director, these defects represent a direct threat to your project’s timeline and budget, forcing part rejections and difficult supplier negotiations.
Drag marks, also known as galling or scoring, are more than just surface imperfections. On sealing surfaces, they can compromise the airtightness vital for EV controller housings. On structural components, they can act as stress risers, potentially leading to fatigue failures down the road. These defects force you to question your supplier’s process control—is this a minor hiccup or a symptom of a deeper issue with their mold maintenance and operational discipline?
Having spent over 20 years troubleshooting these exact issues, from the workshop floor to our customers’ assembly lines, I can assure you that drag marks are almost always a sign of a preventable process imbalance. By understanding the root causes, you can ask your suppliers the right questions during audits and technical reviews. This article will break down the six most common culprits behind drag marks, giving you the knowledge to proactively prevent this costly defect.
1. Improper Mold Design or Insufficient Draft Angle
This is one of the most fundamental causes of drag marks, rooted in the initial design of the mold tooling itself. A draft angle is a slight taper applied to the vertical walls of the mold cavity. Without this taper, the vertical surfaces of the casting would be parallel to the direction of ejection, creating immense friction as the part is pushed out.
- The Cause: When the draft angle is insufficient or, in the worst case, non-existent, the solidifying aluminum casting shrinks and grips tightly onto the mold core or cavity walls. During ejection, instead of releasing cleanly, the surface of the part is dragged and scored against the steel mold, creating linear marks.
- My Expert Insight: This is precisely why a thorough Design for Manufacturability (DFM) analysis is non-negotiable. I’ve seen countless designs where a lack of draft on a deep rib or boss was the root cause of persistent quality issues. A good supplier will identify and correct this before a single piece of steel is cut, saving weeks of delays and thousands in tool rework costs. A minimum of 1-2 degrees of draft is standard, but complex geometries may require more.
2. Worn or Damaged Die Surfaces
A die-casting mold is a high-wear tool, subjected to immense thermal and physical stress with every cycle. Over time, the meticulously polished surface of the mold cavity can degrade.
- The Cause: Micro-scratches, heat checking (fine cracking caused by thermal fatigue), or small pits on the mold surface act like tiny hooks that snag the surface of the aluminum casting. As the part is ejected, this mechanical interference causes drag marks. The damage can be gradual due to normal wear or can occur suddenly if an ejected part fails to clear the die, causing damage on the next cycle.
- What to look for in a supplier: Ask about their preventative mold maintenance program. Do they have a clear schedule for polishing, cleaning, and inspecting their tools? A mature supplier will track the tool’s shot count and perform routine maintenance to ensure the cavity surfaces remain smooth and free of defects.
3. Inadequate Lubrication or Release Agent Application
The release agent, or die lubricant, serves two critical functions: it cools the die surface and creates a barrier film between the molten aluminum and the steel mold. This film is essential for preventing the aluminum from soldering (welding) to the die and ensuring a clean release.
- The Cause: If the lubricant is applied incorrectly—too little, unevenly, or using a diluted mixture—this protective barrier breaks down. Hot spots can form where the aluminum sticks to the die. When the ejector pins push the part out, the stuck areas are torn away, resulting in severe drag marks.
- My Expert Insight: This is often an issue of process control. Automated spray systems are far superior to manual application, but even they need to be precisely calibrated. The spray heads must be aimed correctly, the nozzles must be clean, and the mixing ratio of lubricant to water must be consistently monitored. During a supplier audit, I always pay close attention to their die lube preparation and application process; it’s a direct indicator of their operational discipline.
4. Incorrect Ejection Force or Timing
The ejection system—comprised of ejector pins that push the casting out of the die—must operate with precision. The timing and force of this action are critical process parameters.
- The Cause:
- Ejecting too early: If the casting has not cooled sufficiently, it will be too soft. Even with proper draft and lubrication, the force of the ejector pins can deform or tear the casting’s surface as it’s pushed out.
- Uneven ejection force: If some ejector pins push with more force or move sooner than others, the casting can be skewed in the mold. This causes it to bind on one side, leading to severe drag marks as it’s forcibly extracted.
- What this means for quality: This points to a weak process control setup. A robust process will have precisely set cooling times and a balanced ejection system. Imbalance can also induce stress in the part, which is a hidden risk beyond the visible surface defect.
5. High Casting Temperature and Excessive Metal Flow Speed
The parameters of the injection process itself play a significant role. The temperature of the molten aluminum and the speed at which it’s injected into the mold must be carefully controlled.
- The Cause:
- Excessive metal temperature: Hotter aluminum is more aggressive and has a higher tendency to solder to the steel die, overpowering the protective lubricant film.
- High injection speed: While high speed is needed to fill the cavity quickly, excessive velocity can cause erosion of the die surface (die erosion), creating a rough texture that leads to drag marks. This high-speed flow can also "wash away" the lubricant from critical areas before solidification is complete.
- Process Control: This is a delicate balance. The goal is to fill the mold completely before the metal freezes off, but without causing soldering or erosion. A world-class die caster uses mold flow simulation software to predict these issues and optimize injection parameters before the tool is even built.
6. Contamination or Build-Up on Mold Cavity Surface
Over many production cycles, the mold cavity can accumulate build-up. This isn’t just leftover lubricant; it can be a combination of aluminum oxide, burnt lubricant residue, and other impurities.
- The Cause: This build-up creates a rough, uneven surface within the mold. Just like a worn tool, this rough patch will cause the casting to stick and drag upon ejection. The issue is often progressive, starting as a small blemish and getting worse over time as the build-up increases.
- Importance of In-Process Cleaning: This highlights the need for a disciplined cleaning schedule, not just during major preventative maintenance but also during the production run itself. Operators should be trained to recognize the early signs of build-up and perform quick, in-press cleaning to prevent the issue from escalating into a major quality problem.
Summary: A Holistic Approach to Defect Prevention
Ultimately, preventing drag marks requires a holistic view of the die-casting process. It starts with a robust DFM and mold design, is executed with well-maintained tooling and tightly controlled process parameters, and is sustained by disciplined operator practice.
| Root Cause | Prevention Strategy |
|---|---|
| Poor Mold Design | Conduct thorough DFM; ensure adequate draft angles (1-2° min). |
| Worn/Damaged Die | Implement a rigorous preventative mold maintenance and polishing schedule. |
| Inadequate Lubrication | Use automated spray systems; maintain consistent mix ratios and nozzle cleanliness. |
| Incorrect Ejection | Optimize cooling time; ensure balanced and properly sequenced ejector pins. |
| High Temperature/Speed | Use mold flow simulation to set optimal parameters; monitor process closely. |
| Contamination/Build-Up | Schedule regular in-process mold cleaning to remove residue. |
When you see drag marks, don’t just reject the part. Use this checklist to ask your supplier targeted questions. Their answers will reveal the true strength and maturity of their quality and process control systems.
Are you struggling with inconsistent quality and surface defects from your current die-casting supplier?
My team at EMP Tech and I specialize in creating robust, stable processes that deliver flawless components. We provide a complete one-stop solution—from DFM and mold flow simulation to process implementation and factory inspection—to eliminate defects before they happen.
Let’s work together to achieve the quality and consistency your projects demand. Contact me at [email protected] to schedule a consultation.


